


How to Charge Lithium Battery:Steps
Catalog
Step 1: What You’ll NeedStep 2: Power SupplyStep 3: Step-Up/Step-Down ModuleStep 4: Battery Management System (BMS)Step 5: RelayRelay Calculation & Delay CircuitFrequently Ask QuestionsThere are many different ways to build a battery setup for a portable device or vehicle. Here, I’ll walk you through how I put together one for an electric longboard and another for a portable speaker (also known as a boombox). I won’t dive into which battery type to choose—that depends on your specific use—but instead I’ll focus on how you can charge virtually any lithium battery.
This guide is intended for lithium cells (such as 18650, LiPo, LiHV, and others) that require the CC-CV charging method (constant current, constant voltage). The system can also work with other battery types, as long as they are designed to be charged using CC-CV.
In the CC-CV process, the charger regulates the voltage while maintaining the current you’ve set. Once the battery reaches its maximum charge voltage, the current is gradually reduced to prevent the voltage from going above the specified limit.
Step 1: What You’ll Need
From power source to battery cells:
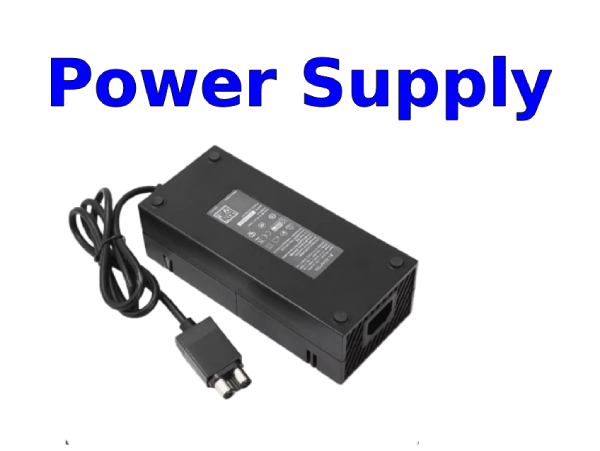
- AC-DC power adapter (here’s a reliable option)
- Female DC plug that matches your adapter
- Step-up or step-down DC-DC converter with adjustable current (examples I used: step-up, step-down)
- Battery Management System (BMS) (one for 3S, one for 6S)
- Optional: Relay with a signal input voltage close to your adapter’s output voltage
In my builds, the AC-DC power adapter has been the main limiting factor for fast charging. Mine is rated at 120 W, and it runs at full capacity while charging. If you want faster charging, consider a higher-wattage power supply, a bench power supply, or even a stationary computer power supply. Keep in mind that faster charging means higher currents, which generate more heat—so you may need a stronger DC-DC converter or better cooling.
That said, lithium cells actually benefit from slower charging, which extends their lifespan. Never charge a battery faster than it’s designed to handle.
This setup also makes it possible to use different input voltages without changing the output. For instance, my wall adapter provides 19.5 V, but I can also charge from my car at 12 V. The DC-DC converter adjusts automatically, keeping the output voltage and current consistent.
Most power adapters come with a male plug, so be sure to get a female plug for your project to keep the build clean and secure!
Step 2: Power Supply
Here are two examples from my builds:
a. Electric Longboard – Uses a 9s1p LiHV battery (high-voltage lithium polymer), which charges up to 4.3 × 9 = 39.15 V.
b. Boombox – Uses a 3s16p lithium-ion battery (18650 cells), which charges up to 4.2 × 3 = 12.6 V.
Both projects run from the same laptop power adapter, rated at 19.5 V / 7.2 A.
- For the longboard, I use a DC-DC CC-CV Step-Up converter to boost the voltage from 19.5 V to 39.15 V (or whichever voltage I need).
- For the boombox, I use a DC-DC CC-CV Step-Down converter to reduce the voltage from 19.5 V to 12.6 V (or my chosen value).
In general, your power adapter should be close in voltage to your battery pack. Still, keep in mind that a step-up/step-down module needs some difference between input and output voltage to work properly.
Example: If you have a high-voltage battery (say, above 30 V), you wouldn’t want to use a 5 V power supply. To provide enough charge, the input current would be extremely high, which creates a lot of heat—and heat is bad for both safety and efficiency.
Charging a 3S Battery Example (12.6 V full charge)
There are two common approaches:
- Higher Voltage Supply + Step-Down Module Use a power adapter with a voltage above ~15 V, combined with a DC-DC CC-CV Step-Down module. The higher input ensures the module has enough headroom to regulate properly (check the datasheet for exact requirements).
- Lower Voltage Supply + Step-Up Module Use a low-voltage adapter (for example, a 5 V supply) with a DC-DC CC-CV Step-Up module. This can even be powered from USB, since USB outputs 5 V.
- But be very careful—never set your Step-Up module to draw more current than the USB port can provide, or you could damage your computer or other USB power source.
Power Output Comparison
- A typical 5 V adapter at 1 A → 5 W output
- A typical 15 V adapter at 5 A → 75 W output
That’s a massive difference in charging capability!
Step 3: Step-Up/Step-Down Module
Make sure you choose a Step-Up or Step-Down converter that has adjustable current control. The cheapest versions often don’t include this feature—without it, you don’t actually have a true CC-CV charger.
For example, my Step-Up module for the Electric Longboard delivers around 3 A (limited by the power adapter), and it still runs warm to the touch even though it’s rated for 10 A. To avoid overheating, always pick a module with at least 50% more capacity than you expect to use. Otherwise, consider adding a heatsink or small fan to help with cooling.
Some modules come with a built-in display, while others don’t:
- For my Electric Longboard, space was tight, so I used a Step-Up module without a display.
- For the Boombox, I used a Step-Down module with a display, which makes it easy to monitor battery voltage and charging current.
With a display, you won’t need a multimeter during setup—just set the output voltage and current directly. Without a display, you’ll need a multimeter to measure both voltage and current while adjusting the module. Once it’s configured, you won’t need the meter again for normal charging; just plug in your adapter and go.
Note: Some Step-Up modules are marketed as “LED drivers” or “voltage boosters.” That’s because LEDs require constant current, and a Step-Up module with adjustable current control is ideal for powering them. Don’t let the name confuse you—it’s essentially the same kind of module.
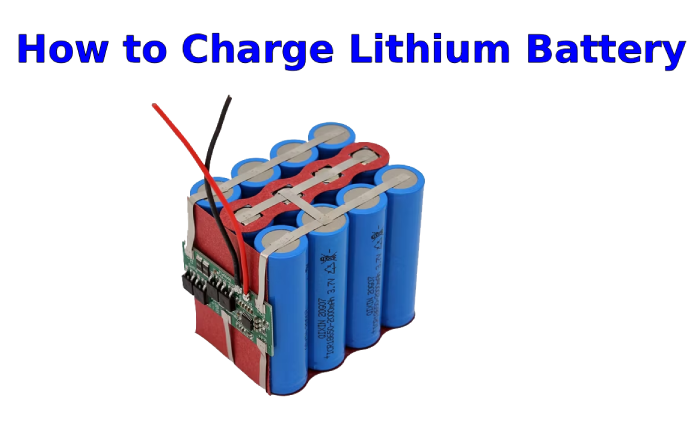
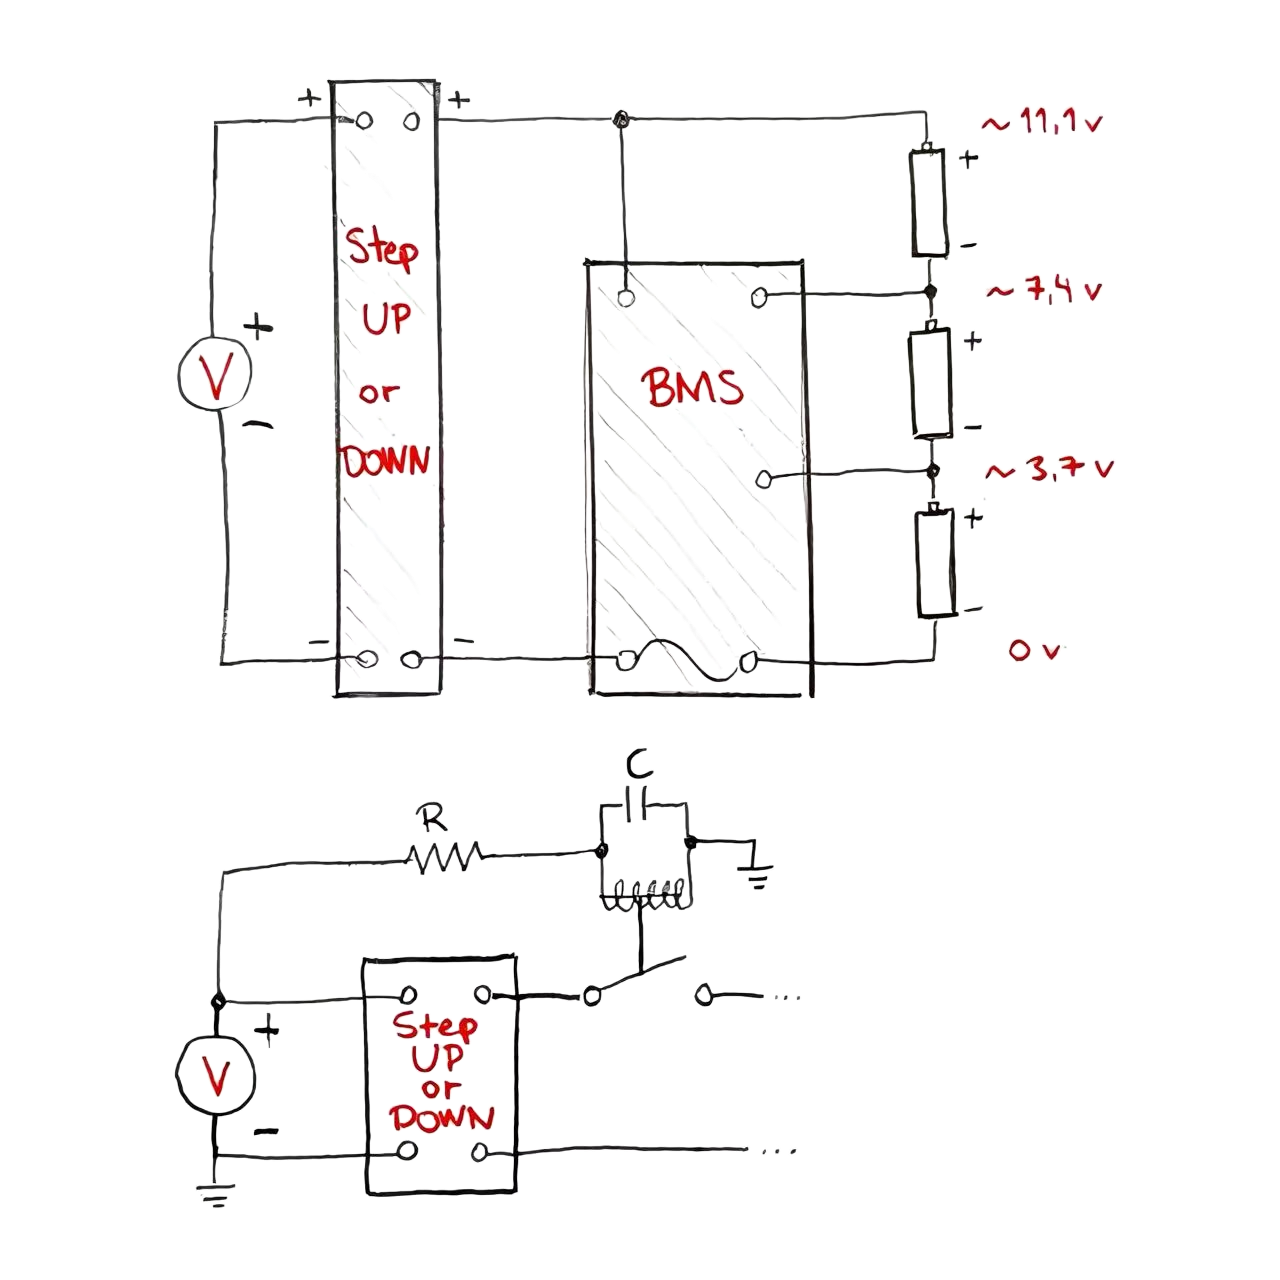
Step 4: Battery Management System (BMS)
If you’re charging just a single cell or multiple cells connected in parallel (1S), you can skip this step. But if your battery pack has multiple cells connected in series, you’ll need a BMS (Battery Management System).
Each lithium cell is meant to charge up to 4.2 V. For example, a 2S pack should reach 8.4 V in total. The issue is that without protection, one cell might end up at 4.1 V while another creeps up to 4.3 V—still 8.4 V combined, but unsafe for the cell that exceeded 4.2 V. This imbalance is where the BMS comes in, ensuring that all cells stay within safe limits by balancing the charge.
Some people argue that if you’re using brand-new cells from the same batch, they’re matched closely enough that you don’t need a BMS. That may be true at first, but after dozens—or even hundreds—of charge cycles, cells can drift apart. Unless you want to manually measure and balance cell voltages, a BMS is the safer option.
For high-power applications, the need becomes even greater. Drawing a lot of current exaggerates the small differences between cells, causing their voltages to diverge faster. In these cases, a BMS is strongly recommended.
For example, my electric longboard occasionally pulls 40 A, which is more than most BMS units can handle (including mine). Because of this, I only use the BMS during charging. On discharge, I avoid draining cells below 3.5 V, leaving a buffer above their absolute minimum voltage. Even if the cells drift a little, none will hit dangerously low levels.
Some BMS boards also include a temperature sensor (often looks like a ceramic resistor on two wires), typically set around 65 °C. Personally, I don’t think it’s essential—just keep an eye on your components during the first few charge cycles. If you notice excessive heat, simply lower the charging current on your Step-Up/Down module.
Step 5: Relay
Relay circuit
A relay isn’t essential for the charging system, but it can add some useful features. Plus, I personally enjoy the little click it makes when the power adapter is plugged in.
One issue I wanted to solve was preventing the Step-Up/Down module from slowly draining the battery when my Electric Longboard or Boombox wasn’t in use. For example, the Step-Down module’s screen lights up whenever there’s voltage on either the input or output, which means it constantly draws a small current. Over time, this parasitic drain could discharge and damage the battery. The solution? Add a relay.
The idea is simple: the relay only enables power to the Step-Up/Down module when the input adapter is connected. This way, the module isn’t left sipping power from the battery when idle.
Another nice feature you can add with a relay is a delayed connection between the load (the battery) and the module. This short delay allows the Step-Up/Down module to fully charge its internal capacitors before applying voltage to the battery. You can achieve this with a resistor-capacitor (RC) circuit controlling the relay’s coil.
Here’s where it gets interesting: when you place a resistor in series with the relay coil, you create a voltage divider. The coil itself behaves like a resistor, so depending on its resistance and the added resistor value, the coil voltage is reduced.
Most common relays are rated for 12 V. If your power adapter supplies more than 12 V, this voltage divider effect is actually helpful—it drops the coil voltage down into a safe range. Let’s run through some calculations to illustrate how this works...
Relay Calculation & Delay Circuit
My power supply outputs 19.5 V, and I’m using a 12 V relay. According to the datasheet, the relay coil has a resistance of 320 Ω. Using Ohm’s law (or a simple calculator), we can figure out the required resistor:R=(1219.5)×320≈200 ΩR = \left(\frac{12}{19.5}\right) \times 320 \approx 200 \, \OmegaR=(19.512)×320≈200Ω
So, adding a 200 Ω resistor in series with the coil will drop the voltage down to about 12 V, which the relay can safely handle.
Adding a Capacitor for Delay
Next, we add a capacitor in parallel with the coil. When voltage is first applied, the capacitor draws a surge of current as it charges. Because of the series resistor (200 Ω), the charging is slowed down. This delays the voltage rise across the coil, meaning the relay doesn’t switch immediately.
Let’s run the numbers:
- Coil resistance = 320 Ω
- Added resistor = 200 Ω
- Total resistance = 520 Ω
- Capacitor = 1000 µF
Using an RC time constant calculator:τ=R×C=520×0.001=0.52 seconds\tau = R \times C = 520 \times 0.001 = 0.52 \, \text{seconds}τ=R×C=520×0.001=0.52seconds
This means it takes about 0.5 seconds for the capacitor voltage to reach ~63% of its final value. Since the relay requires around 75% of 12 V to activate (per datasheet), the relay will switch after roughly half a second. That’s more than enough time for the Step-Up/Down module to charge its internal capacitors before connecting to the battery.
Extra Benefits
- When the power adapter is unplugged, the relay disconnects the battery completely from the Step-Up/Down module. No leakage current, no risk of slow battery drain in storage.
- You can also add a diode to block any unwanted “back current” into the Step-Up/Down module. However, finding one with low resistance and high current capability can be tricky. If the diode’s resistance is too high, it will reduce output current and generate heat—sometimes impractically so.
- Of course, there are many other circuits that can provide a delay function. But this relay + resistor + capacitor setup is both cheap and simple, which makes it very practical.
Frequently Ask Questions
Do I need a special charger for lithium batteries?
Yes. Using the wrong charger can trigger fault codes that may harm not only the battery but also other electronic components and even the charger itself. That’s why we highly recommend using a dedicated lithium battery charger.
How can I revive a dead lithium battery?
It depends on how far the battery has been discharged and whether it has a built-in protection circuit. In some cases, you can “wake” it by briefly applying a 3–4V power source directly to the terminals.
Can I charge a lithium battery with a regular solar charger?
Yes, as long as you use a charge controller. Lithium-ion batteries can be charged with almost any type of solar panel, including flexible or rigid panels, as long as the controller manages the process.
How do I charge a 12V lithium battery at home?
Make sure your DC power supply matches the required battery voltage (usually 12V or 24V). You’ll also need the correct adapter cable. Using the wrong voltage or an unregulated power source can cause overheating, slow charging, or even permanent damage to the battery.

Amanda Miller
Amanda Miller is a senior electronics engineer with 6 years of experience. She focuses on studying resistors, transistors, and package design in detail. Her deep knowledge helps her bring innovation and high standards to the electronics industry.
Subscribe to JMBom Electronics !


