
How to Test and Inspect Resistors:Types,Tips and FAQ
Catalog
Testing Methods for Various Types of ResistorsHow to Test and Inspect Resistors PrecautionsFrequently Ask QuestionsRelated ArticlesTesting Methods for Various Types of Resistors
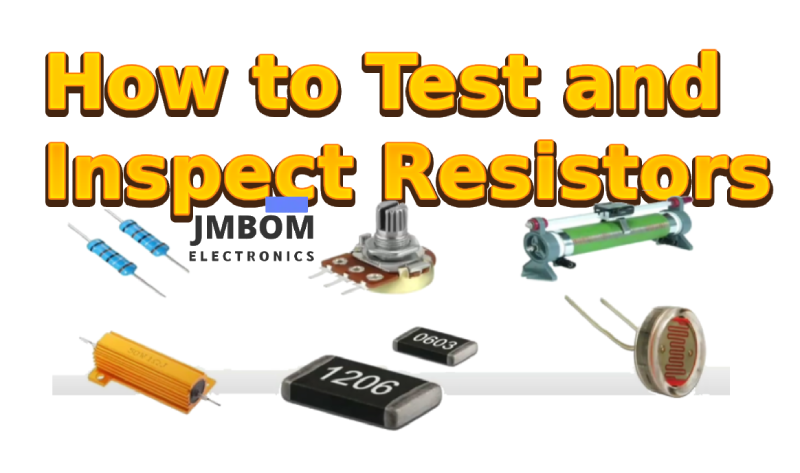
Resistors, commonly referred to as resistors in everyday life, are components that limit the flow of electric current. Typically, resistors have two leads and a fixed resistance value, which restricts the amount of current passing through the circuit. However, like any other product, the quality of resistors can vary. Join us as we explore how to test and inspect resistors effectively.
Testing Fixed Resistors
A) Connect the two probes (polarity doesn't matter) to the resistor's terminals to measure the actual resistance value. To enhance measurement accuracy, select the range based on the resistor's nominal value. Due to the nonlinear scale of the ohm range, the middle section is more precise. Therefore, aim to position the needle within the middle segment of the scale, specifically within the 20% to 80% arc of the full scale, for more accurate readings. Depending on the resistor's tolerance grade, allowable deviations between the measured value and the nominal value can be ±5%, ±10%, or ±20%. If the deviation exceeds this range, the resistor's value has likely changed.
B) When testing, especially for resistors with values above tens of kΩ, avoid touching the probes and the conductive parts of the resistor. The resistor being tested should be desoldered from the circuit, at least at one end, to prevent other components from affecting the measurement and causing errors. Although the value of a color-coded resistor can be determined by its color bands, it's advisable to verify the actual resistance value using a multimeter before use.
Testing Cement Resistors
The method and precautions for testing cement resistors are identical to those for testing ordinary fixed resistors.
Testing Fuse Resistors
In a circuit, when a fuse resistor has blown open, you can make a judgment based on experience: if the surface of the fuse resistor is blackened or charred, it indicates that the load was excessive, and the current passing through it was many times higher than the rated value. If there are no visible marks on the surface but it has opened, it suggests that the current was just equal to or slightly higher than the rated blowout value. For fuse resistors with no visible marks, you can use the R×1 range of a multimeter to test them. To ensure accurate measurement, desolder one end of the fuse resistor from the circuit. If the measured resistance is infinite, the fuse resistor has failed and is open. If the measured value significantly deviates from the nominal value, the resistor has changed value and should not be used. In repair practice, it has been found that a few fuse resistors can also be short-circuited in the circuit, which should also be noted during testing.
Testing Potentiometers
When inspecting a potentiometer, first rotate the shaft to check if it moves smoothly, if the switch is flexible, and if the "click" sound when the switch is turned on and off is crisp. Also, listen for any "sanding" noise from the internal contact points and the resistive element; if there is a "rustling" sound, it indicates poor quality. When using a multimeter for testing, select the appropriate resistance range based on the potentiometer's nominal value and proceed with the following methods.
A) Use the ohm range of the multimeter to measure between terminals "1" and "2." The reading should match the potentiometer's nominal resistance value. If the multimeter's needle doesn't move or the resistance value differs significantly, the potentiometer is likely damaged.
B) Check the contact between the potentiometer's wiper and the resistive element. Using the ohm range of the multimeter, measure between terminals "1" and "2" (or "2" and "3"). Rotate the shaft counterclockwise to a position close to "off," where the resistance should be as low as possible. Then, slowly rotate the shaft clockwise; the resistance should gradually increase, and the needle on the multimeter should move smoothly. When the shaft is rotated to the extreme position "3," the resistance should be close to the potentiometer's nominal value. If the needle jumps during rotation, it indicates poor contact between the wiper and the resistive element.
Testing Positive Temperature Coefficient Thermistors (PTC)
When testing, use the R×1 range of a multimeter, and the process can be divided into two steps:
A) Ambient Temperature Test (Room temperature close to 25℃)
Contact the two probes with the terminals of the PTC thermistor to measure its actual resistance value and compare it with the nominal value. If the difference is within ±2Ω, it is considered normal. If the actual resistance value significantly deviates from the nominal value, it indicates poor performance or damage to the thermistor.
B) Heating Test
After confirming that the ambient temperature test is normal, proceed to the second step— the heating test. Bring a heat source (e.g., a soldering iron) close to the PTC thermistor to heat it while monitoring its resistance value with a multimeter. If the resistance increases with temperature, the thermistor is functioning correctly. If there is no change in resistance, it suggests that the thermistor's performance has deteriorated and it should not be used further. Be cautious not to place the heat source too close to or in direct contact with the PTC thermistor to avoid damaging it.
Testing Negative Temperature Coefficient Thermistors (NTC)
A) Measuring Nominal Resistance Value Rt
The method for measuring an NTC thermistor with a multimeter is the same as for measuring an ordinary fixed resistor. Select the appropriate resistance range based on the NTC thermistor's nominal value to directly measure the actual value of Rt. However, since NTC thermistors are highly sensitive to temperature, the following points should be noted during testing:
- Rt is measured by the manufacturer at an ambient temperature of 25℃. Therefore, when measuring Rt with a multimeter, it should also be done at an ambient temperature close to 25℃ to ensure the reliability of the test.
- The measurement power should not exceed the specified value to avoid measurement errors caused by the thermal effect of the current.
- Pay attention to proper operation. When testing, avoid holding the thermistor body with your hands to prevent body temperature from affecting the test results.
- B) Estimating Temperature Coefficient αt
- First, measure the resistance value Rt1 at room temperature t1. Then, use a soldering iron as a heat source and bring it close to the thermistor Rt to measure the resistance value Rt2. Simultaneously, use a thermometer to measure the average surface temperature t2 of the thermistor Rt and then perform the calculation.
Testing Varistors
- Use the R×1k range of a multimeter to measure the forward and reverse insulation resistance between the two terminals of a varistor. Both should be infinite. Otherwise, it indicates a high leakage current. If the measured resistance is very low, the varistor is damaged and unusable.
Testing Photoresistors
- A) Cover the light-transmitting window of the photoresistor with a piece of black paper. The multimeter's needle should remain almost stationary, with a resistance value close to infinity. The higher this value, the better the performance of the photoresistor. If this value is very low or close to zero, the photoresistor has been burned through and is no longer usable.
- B) Direct a light source at the light-transmitting window of the photoresistor. The multimeter's needle should swing significantly, and the resistance value should decrease noticeably. The lower this value, the better the performance of the photoresistor. If this value is very high or infinite, it indicates that the photoresistor is internally open-circuited and no longer usable.
- C) Align the light-transmitting window of the photoresistor with the incident light and wave a small piece of black paper above the light-blocking window of the photoresistor to intermittently expose it to light. The multimeter's needle should swing back and forth with the waving of the paper. If the multimeter's needle remains stationary at a certain position and does not swing with the waving of the paper, it indicates that the photosensitive material of the photoresistor has been damaged.
How to Test and Inspect Resistors
Step 1:Visual Inspection
- Check for clear markings, intact protective coating, no signs of burning, damage, cracks, or corrosion.
- Ensure the resistor body is tightly connected to the leads.
- For variable resistors, verify that the shaft is flexible, properly tensioned, and comfortable to operate.
- If the resistor has a switch, test the switch to ensure it functions normally.
Step 2:Multimeter Testing

(1) Using an Analog Multimeter
- Select the appropriate measurement range based on the resistor's value:For resistors below 100 ohms, use the R×1 range.For resistors between 100 ohms and 1K ohms, use the R×10 range.For resistors between 1K ohms and 10K ohms, use the R×100 range.For resistors between 10K ohms and 100K ohms, use the R×1K range.For resistors above 100K ohms, use the R×10K range.
(2) Zero Adjustment
- Before measuring, short-circuit the metal tips of the multimeter probes and check if the needle points to zero.
- If the needle is not at zero, adjust the zero-adjustment knob until the needle points to the zero mark on the resistance scale.
(3) Measuring the Resistor
- Connect the multimeter probes to the resistor's leads.
- The needle should point to the corresponding resistance value on the scale.
- If the needle does not move, shows an unstable reading, or the measured value significantly differs from the marked value, the resistor is likely damaged.
(4) Using a Digital Multimeter
- the multimeter to the appropriate ohm range based on the resistor's value:For resistors below 200 ohms, use the 200 ohm range.For resistors between 200 ohms and 2K ohms, use the 2K ohm range.For resistors between 2K ohms and 20K ohms, use the 20K ohm range.For resistors between 20K ohms and 200K ohms, use the 200K ohm range.For resistors between 200K ohms and 2M ohms, use the 2M ohm range.For resistors between 2M ohms and 20M ohms, use the 20M ohm range.For resistors above 20M ohms, use the 200M ohm range.
Step 3: Measuring Resistance with a Wheatstone Bridge
For precise measurement of a resistor's value, a Wheatstone bridge (digital type) can be employed. Insert the resistor into the measurement terminal of the bridge, select the appropriate range, and the resistance value will be displayed on the screen. For instance, when creating a resistor from a resistance wire or processing a fixed resistor to achieve a specific, precise resistance value, it is essential to use a Wheatstone bridge to measure the resistance of the homemade resistor.:
Precautions
When measuring resistance, pay attention to the following two points:
(1) Choose the range based on the resistance value being measured, ensuring that the pointer indicates the middle section of the scale for better observation.
(2) After selecting the resistance range, perform zero adjustment by short-circuiting the probes (touching them together) and adjusting the "zero" control until the pointer accurately points to the "0" on the ohm scale. Additionally, avoid touching the resistor's terminals or the metal parts of the probes with your hands, as this can cause measurement errors.
These are all the methods and precautions for testing the condition of a resistor. Generally, if the measured resistance value is close to the nominal value using a multimeter, the resistor can be considered to be in good condition. If the measured value is significantly different or shows no continuity, the resistor is likely faulty. By following these simple testing methods, you can quickly determine the condition of a resistor and find a suitable, functional one.
Frequently Ask Questions
How to Test a Resistor?
To test a resistor using an ohmmeter, first ensure the power is off and the resistor is disconnected from the circuit. Then, attach the ohmmeter's leads to the resistor's leads and read the displayed resistance value in ohms or kilohms.
How to Identify a Shorted Resistor?
When calculating equivalent resistance, a shorted resistor is identified by both of its ends being connected to the same node. A shorted resistor (1) contributes zero ohms to the equivalent resistance and (2) can be omitted from the circuit during equivalent resistance calculations.
How to Check if a Resistor is Open?
An open resistor is one that shows an infinite resistance value. For instance, when measuring an open resistor, the device or multimeter will display "OL" on the screen. An open resistor is always considered faulty.
Related Articles
LR41 Battery Equivalent-A Complete Guide
CR1616 Battery Equivalent:What You Need to Know
A Complete Guide to 357 Battery Equivalent
DL2032 vs CR2032:Which One is Best
Subscribe to JMBom Electronics !


