


How Can You Fix an Oil Pressure Sensor?
Catalog
What Exactly Is an Oil Pressure Sensor?How the Sensor WorksApplications of Oil Pressure SensorsCauses of Oil Pressure Sensor FailureStep-by-Step Guide to Replacing an Oil Pressure SensorConclusionIs your car’s check-engine light constantly popping up with an oil-pressure warning? If so, your oil pressure sensor might be the culprit.
What Exactly Is an Oil Pressure Sensor?
An oil pressure sensor (sometimes called an oil pressure switch or pressure sending unit) monitors the engine’s oil pressure and sends information either to the vehicle’s ECU or directly to the gauge on your dashboard.
Its main job is to make sure your oil pressure stays within a safe range, as engine oil is essential for lubricating and protecting key engine components.
If the oil pressure becomes too high or too low, it can point to issues such as oil leaks, a faulty oil pump, or worn internal parts—so having an accurate oil pressure sensor is vital for diagnosing potential engine problems early on.
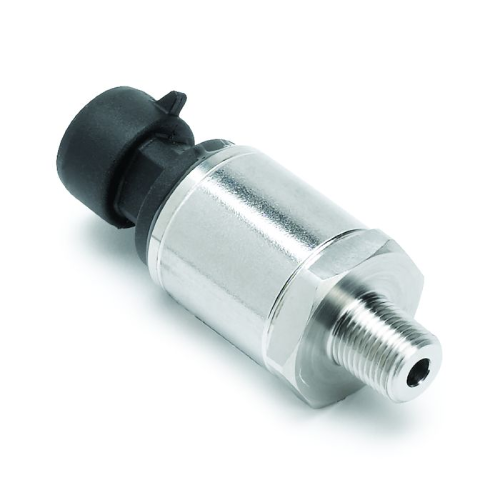
oil pressure sensor
How the Sensor Works
1. Pressure Detection
The sensor includes a diaphragm or pressure element that reacts to any changes in oil pressure.
2. Sending the Signal
Depending on the design, the signal output can be analogue (like resistance or voltage changes) or digital, which is then read by the engine management system.
3. Warning the Driver
If the oil pressure moves outside the normal range, the system will switch on the low or high oil-pressure warning light, prompting the driver to check the oil level or engine condition.
Applications of Oil Pressure Sensors
Oil pressure sensors are mainly used in:
• Passenger Vehicles
To keep an eye on the engine’s condition and alert the driver to possible issues before serious damage occurs.
• Heavy-Duty Equipment
Used in industrial machines to make sure oil pressure stays at a safe level and to help prevent costly mechanical breakdowns.
• Aerospace and Marine Engines
In aircraft engines and marine propulsion systems, precise and continuous monitoring of oil pressure is essential for safety and reliable operation.
Causes of Oil Pressure Sensor Failure
Oil pressure sensors can fail for a number of reasons, which can result in incorrect readings or a complete loss of oil-pressure information. Common causes include:
1. General Wear and Age
Over time, internal parts such as the diaphragm or electronic components can deteriorate. This is especially common on older or high-mileage vehicles where heat, vibration, and constant oil flow gradually take their toll.
2. Contaminated Oil
Dirty oil containing sludge, debris, or metal particles can block or corrode the sensor. If the openings become clogged, the sensor may give inaccurate readings or stop working entirely.
3. Electrical Problems
Damaged wiring or loose connections can prevent the sensor from sending a proper signal to the engine control unit. This can lead to intermittent faults or a complete loss of signal.
4. Excessive Heat
Since the sensor sits close to the engine, it is exposed to high temperatures. Prolonged heat can damage electronic seals and other internal components.
5. Physical or Mechanical Damage
Impact damage caused during installation, engine work, or even from debris on the road can crack the housing or connectors, which may cause leaks or sensor failure.
6. Too Much Oil Pressure
If the engine experiences unusually high oil pressure—for example due to a faulty oil pump—this can exceed the sensor’s rated limit and lead to failure.
7. Poor-quality or Faulty Components
Cheap or defective sensors often fail sooner, particularly if they’re poorly protected against heat, contamination, or electrical interference.
Step-by-Step Guide to Replacing an Oil Pressure Sensor
Step 1: Find the Oil Pressure Sensor
Start by locating the oil pressure sensor on your vehicle. It’s usually positioned near the oil filter or the oil pan, although the exact location varies between makes and models.
If you’re unsure, refer to your owner’s manual or check a reliable online guide for your specific vehicle.
Once located, make sure you have enough room to reach it comfortably. A torch or work light can be very helpful, especially as sensors are often tucked away in darker parts of the engine bay.
Step 2: Disconnect the Battery (Safety First)
Before doing any electrical work, disconnect the battery.
The battery is normally found under the bonnet. Using a suitable spanner or socket, remove the negative terminal first, followed by the positive if necessary.
This prevents accidental short-circuits, reduces the risk of electric shock, and helps protect the vehicle’s electrical system while you work.
Step 3: Unplug the Electrical Connector
Carefully remove the electrical connector from the sensor. This connector supplies power and sends the signal to the ECU, so handle it gently.
Check for locking clips or tabs, press them down, and pull the connector straight off—never pull on the wires themselves.
If the connector feels stuck, gently wiggle it rather than forcing it, as this could cause damage.
Step 4: Remove the Faulty Sensor
Once disconnected, use a correctly sized socket to remove the old sensor.
Turn the socket anti-clockwise until the sensor comes free. Some oil may escape when it’s removed, so keep a rag or cloth close by.
If the sensor feels tight, take your time—forcing it may damage the thread or surrounding parts.
Step 5: Clean the Area and Fit the New Sensor
Before installing the replacement sensor, clean the mounting area using a rag. Remove any dirt or old oil to ensure a proper seal.
Screw in the new sensor by hand to avoid cross-threading, and apply a small amount of thread sealant if recommended.
Once fitted, use a socket to tighten it carefully—do not overtighten, as this may damage the sensor or engine threads.
Step 6: Reconnect and Test
Reconnect the electrical plug until it clicks into place. Then reconnect the battery—positive terminal first, followed by the negative.
Start the engine and check that the oil-pressure warning light has gone out.
Lastly, inspect the sensor area for any signs of an oil leak. If everything is dry and the warning light stays off, the job’s done!
Conclusion
A correctly working oil pressure sensor is essential for the health and long life of your engine. By following this step-by-step guide, you should be able to replace a faulty sensor yourself and restore accurate oil-pressure readings. Always refer to your vehicle’s manual for specific fitting instructions and torque settings, as these vary between models.
Regular maintenance and paying attention to early warning signs can help prevent future sensor issues and avoid expensive engine repairs. Having a basic understanding of how the system works makes it much easier to look after your vehicle.
If you’re unsure about any part of the process, it’s always best to speak to a qualified mechanic to make sure the job is done properly.

Amanda Miller
Amanda Miller is a senior electronics engineer with 6 years of experience. She focuses on studying resistors, transistors, and package design in detail. Her deep knowledge helps her bring innovation and high standards to the electronics industry.
Subscribe to JMBom Electronics !


