
How to Determine Capacitor Polarity
Catalog
Types of CapacitorsNon‑Polarized CapacitorsCapacitor Types at a GlanceHow to Check Capacitor PolarityComparison of MethodsVisual IdentificationMultimeter TestingOscilloscope TestingManufacturer DocumentationHow to Troubleshoot Common ProblemsWhat Happens if Capacitor Polarity Is Reversed?Tips for Ensuring Correct Capacitor PolarityBoost Your Efficiency with Our Reliable Network AnalyzersWe’ve all been there—looking at a confusing lineup of capacitors, each one seeming like it could be the right match for your circuit.
Finding the correct one can feel like cracking a tricky puzzle, and the consequences are serious. Choose the wrong capacitor, and your circuit might not work properly—or in the worst case, fail completely. One of the biggest challenges? Figuring out capacitor polarity.
Engineers regularly run into this problem: projects that depend on the exact type of polarized capacitor, where even a small mistake can throw everything off.
If a capacitor is connected the wrong way around, it can cause anything from minor performance drops to major failures—like leakage, short circuits, or even explosions.
Here’s how you can confidently spot and handle capacitor polarity, keeping your circuits reliable, safe, and running smoothly.
Types of Capacitors
Knowing the difference between polarized and non‑polarized capacitors is key when choosing the right part for your circuit. Each type comes with its own features, uses, and limitations. Here’s a clear overview to guide you:
Polarized Capacitors
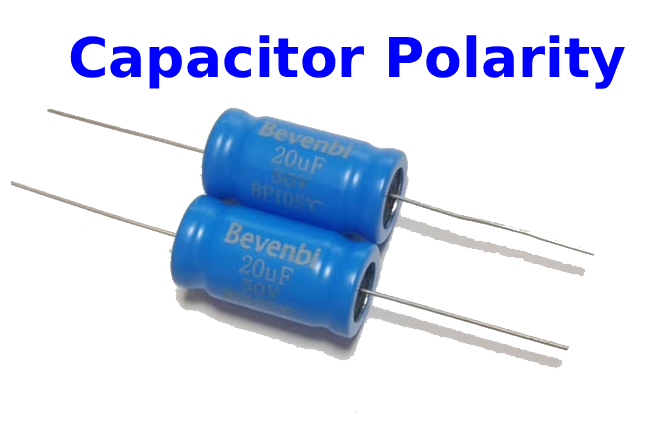
Polarized capacitors need to be installed in the correct orientation to work properly. They have marked positive and negative leads and are often used when higher capacitance values are required.
Electrolytic Capacitors
These use an electrolyte as part of their structure, allowing them to reach very high capacitance levels.
- Key Traits: Wide capacitance range (microfarads to farads), polarized, generally larger in size.
- Common Uses: Power supply filtering, audio circuits, and energy storage.
Tantalum Capacitors
Built with tantalum as the anode, these offer more capacitance per unit volume compared to aluminum electrolytics.
- Key Traits: Compact size, stable and reliable performance, but highly sensitive to reverse polarity and excess voltage.
- Common Uses: Space-limited designs, decoupling, and timing circuits.
Supercapacitors
Also called ultracapacitors, these provide much higher energy storage than standard capacitors.
- Key Traits: Extremely high capacitance (in farads), lower voltage ratings, capable of many charge/discharge cycles.
- Common Uses: Energy storage, backup power, and regenerative braking systems.
Non‑Polarized Capacitors
Non‑polarized capacitors can be installed in either direction, giving them flexibility in circuits. They are especially useful in AC applications, where the current changes direction regularly.
Ceramic Capacitors
These use ceramic material as the dielectric layer.
- Key Traits: Very small size, broad capacitance range (from picofarads to microfarads), good stability across temperature changes.
- Common Uses: High‑frequency circuits, decoupling, and signal filtering.
Film Capacitors
These use a thin plastic film as the dielectric.
- Key Traits: Excellent stability, low inductance, and available in many different shapes and sizes.
- Common Uses: Signal processing, coupling/decoupling, and power factor correction.
Mica Capacitors
Built with mica as the dielectric, these are valued for their accuracy and long‑term reliability.
- Key Traits: Very stable capacitance, low energy losses, and strong performance at high frequencies.
- Common Uses: RF circuits, precision electronics, and high‑voltage applications.
Capacitor Types at a Glance
| Type | Polarized | Dielectric Material | Capacitance Range | Typical Size | Common Applications |
|---|---|---|---|---|---|
| Electrolytic | Yes | Electrolyte | Microfarads → Farads | Large | Power supplies, audio circuits |
| Tantalum | Yes | Tantalum | Microfarads | Small | Decoupling, timing, compact designs |
| Supercapacitor | Yes | Electrolyte | Farads | Large | Energy storage, backup power |
| Ceramic | No | Ceramic | Picofarads → Microfarads | Small | High‑frequency use, decoupling |
| Film | No | Plastic film | Nanofarads → Microfarads | Varies | Signal processing, coupling/decoupling |
| Mica | No | Mica | Picofarads → Nanofarads | Medium | RF circuits, precision, high voltage |
How to Check Capacitor Polarity
Recognizing capacitor polarity is crucial for making sure your electronic circuits function properly—especially when working with polarized capacitors.
Below is a guide to the most common ways to determine capacitor polarity, including practical visual cues for different capacitor types.
General Ways to Identify Capacitor Polarity
- Visual Inspection
- Multimeter Testing
- Oscilloscope Testing
- Manufacturer Documentation
Each method has its own level of difficulty, accuracy, and equipment requirements, depending on the capacitor type and tools available.
Comparison of Methods
| Method | Best for Capacitor Types | Ease of Use | Accuracy | Tools Needed |
|---|---|---|---|---|
| Visual Inspection | Polarized capacitors | Easy | Moderate | None |
| Multimeter Testing | Electrolytic, Tantalum | Moderate | High | Digital multimeter |
| Oscilloscope Testing | Electrolytic, Film | Complex | High | Oscilloscope |
| Manufacturer Documentation | All capacitor types | Easy | Very High | Datasheets, manuals |
Visual Identification
Visual identification is one of the fastest and simplest ways to determine capacitor polarity. It involves checking the markings directly on the capacitor body as well as on the circuit board. Here are the most common indicators:
- ‘+’ and ‘–’ symbols: Many capacitors, especially electrolytics, are marked with a ‘+’ near the positive terminal or a ‘–’ near the negative terminal.
- Colored bands or stripes: Often a darker stripe marks the negative lead.
- Lead length: In some capacitors, the longer lead is positive, while the shorter lead is negative.
- PCB markings: Many circuit boards clearly mark capacitor slots with ‘+’ and ‘–’ indicators to guide placement.
Tantalum Capacitors
Tantalum capacitors, valued for their compact size and high capacitance, include specific polarity markings:
- ‘+’ symbol: A clear ‘+’ marking is usually printed near the positive terminal.
- Color stripe: A solid line or band on the body typically denotes the positive lead.
- Encapsulation color: In some cases, casing color may suggest polarity, though this is less reliable.
Examples:
- SMD tantalum capacitors: Often marked with a stripe or band at the positive end.
- Leaded tantalum capacitors: The longer lead identifies the positive terminal, supported by a ‘+’ marking.
Key Identifiers:
- ‘+’ symbol near positive terminal
- Stripe/band showing polarity
- Longer lead for positive side
Radial Electrolytic Capacitors
Radial electrolytics are widely used due to their large capacitance values and have clear polarity indicators:
- Positive terminal: The longer lead indicates positive.
- Negative terminal: A stripe or band on the body marks the negative side, often with ‘–’ symbols or “NEG.”
Examples:
- Leaded radial capacitors: Stripe or band along the case identifies the negative terminal.
- PCB‑mounted versions: Longer lead = positive, band/stripe = negative.
Key Identifiers:
- Longer lead = positive terminal
- Stripe/band = negative terminal (sometimes with ‘–’ marks)
Aluminum Electrolytic Capacitors
Aluminum electrolytics are another common type, easily identified by their polarity markings:
- Positive terminal: The longer lead shows the positive side.
- Negative terminal: A stripe printed along the case (with ‘–’ signs) marks the negative side.
Examples:
- Can‑type aluminum capacitors: Prominent side stripe shows the negative terminal.
- Radial aluminum capacitors: Same system as radial electrolytics—longer lead = positive, stripe = negative.
Key Identifiers:
- Longer lead = positive terminal
- Stripe with ‘–’ marks = negative terminal
Multimeter Testing
A multimeter can be a handy tool for identifying capacitor polarity, but safety comes first. Always discharge the capacitor completely before testing—otherwise, it can cause electric shock or even damage your multimeter.
You can test capacitor polarity using capacitance mode or resistance (ohmmeter) mode.
Capacitance Mode
This is one of the simplest ways to check polarity, particularly with polarized capacitors such as electrolytics.
Steps:
- Discharge the capacitor: Safely short the terminals using a resistor for a few seconds, or connect them to a ground point in the circuit.
- Set the multimeter: Switch to capacitance mode (look for the capacitor symbol −| |− on the dial).
- Connect the leads: Red lead → one terminal Black lead → the other terminal
- Check the reading: Correct polarity → The display shows a capacitance value close to the rated value. Reversed polarity → The reading may drop significantly or show zero.
- Identify polarity: The terminal connected to the red lead when the reading matches the expected capacitance is the positive terminal.
Resistance Mode (Ohmmeter Mode)
You can also test polarity by checking how the capacitor charges in resistance mode. This method works well for polarized capacitors.
Steps:
- Discharge the capacitor: Again, make sure it’s fully discharged.
- Set the multimeter: Switch to resistance mode (Ω symbol).
- Connect the leads: Red lead → one terminal Black lead → the other terminal
- Watch the resistance reading: At first, the resistance will be low, then gradually rise as the capacitor charges from the meter’s internal voltage.
- Interpret the results: Correct polarity → Resistance starts low and steadily increases. Reversed polarity → Resistance may start high, decrease, or behave erratically.
- Identify polarity: The terminal connected to the red lead when the resistance climbs steadily is the positive terminal.
Oscilloscope Testing
An oscilloscope can be used to determine capacitor polarity by visually displaying how the capacitor responds to a voltage signal. This allows you to see the charging and discharging behavior and identify the positive and negative terminals.
This method is especially helpful when working with polarized capacitors, as their charging curves are distinct.
Steps to Check Polarity
1. Set Up the Oscilloscope
- Discharge the capacitor: Always fully discharge the capacitor before testing to protect the oscilloscope and ensure accurate readings.
- Attach the probes: Connect the oscilloscope probes (Channel 1 is typically used).
- Configure settings: Time base: Set to a scale that clearly shows the charging/discharging curve (milliseconds range is a good starting point). Voltage scale: Adjust to match the expected capacitor voltage (a few volts per division). Trigger mode: Use edge‑triggering on the rising edge for stable waveform capture.
2. Connect the Capacitor
- Circuit setup: Place the capacitor in series with a low‑voltage DC power supply and a resistor. The resistor limits current and produces a visible charging curve.
- Probe placement: Connect the oscilloscope probe across the capacitor terminals.
- Ground connection: Tie the oscilloscope ground to the common ground of the circuit.
3. Observe the Waveforms
- Apply power: Switch on the DC supply to begin charging the capacitor.
- Check the display: Correct polarity: A clean charging curve will appear, starting near zero and rising exponentially toward the supply voltage. The terminal where voltage increases is the positive lead. Reversed polarity: The curve may be distorted, unstable, or fail to show proper charging behavior.
4. Interpret the Results
- Identify positive terminal: The terminal connected to the probe that shows the rising voltage is the capacitor’s positive lead.
- Confirm with discharge: After disconnecting the power, observe the discharge curve. A proper exponential voltage drop toward zero confirms correct polarity.
Manufacturer Documentation
Checking the manufacturer’s datasheet is one of the most reliable ways to verify capacitor polarity. Datasheets provide authoritative information straight from the source, ensuring you install and use capacitors correctly in your circuits.
Why Manufacturer Documentation Matters
- Comprehensive details: Datasheets outline everything about a capacitor—its capacitance, voltage rating, tolerance, physical size, and most importantly, its polarity markings.
- Clear polarity indicators: They specify the exact symbols, colors, or lead lengths used to mark the positive and negative terminals.
- Trusted accuracy: Since the information comes directly from the manufacturer, it’s the most dependable way to avoid installation errors.
- Quick reference: Keeping datasheets handy speeds up verification during design, assembly, and troubleshooting, while minimizing mistakes.
How to Use Datasheets to Confirm Polarity
- Access the datasheet Find the datasheet for your capacitor model—usually downloadable from the manufacturer’s site or your supplier. Focus on sections covering physical design and electrical specs. These often include diagrams showing polarity.
- Understand the markings Look for ‘+’ and ‘–’ symbols in diagrams. Check any color codes or stripes used to mark polarity. Verify if lead length differences are listed (longer = positive, shorter = negative).
- Cross‑check with the actual capacitor Compare the markings on the capacitor itself with those shown in the datasheet. Double‑check other specs—capacitance, voltage rating, case size—to ensure they match.
- Keep documentation accessible Build a personal reference library of datasheets for parts you use often, either digitally or in print. Bookmark manufacturer websites or datasheet databases for quick access to updated files.
Using datasheets as your first point of reference guarantees accuracy, prevents costly errors, and helps you work with capacitors more efficiently.
How to Troubleshoot Common Problems
When working with capacitors, several issues can arise that lead to polarity misidentification and potential circuit failures. Recognizing these problems—and knowing how to fix them—can save time and prevent damage to your projects.
1. Misreading Capacitor Markings
- Issue: Markings may be unclear, faded, or ambiguous, causing confusion about polarity.
- Solution: Always double‑check the capacitor’s markings against the manufacturer’s datasheet. Look for clear identifiers such as ‘+’ and ‘–’ signs, colored bands, or lead length differences.
2. Mixing Up Capacitor Types
- Issue: Different capacitor types (electrolytic, tantalum, supercapacitors, etc.) use different polarity indicators, which can be confusing.
- Solution: Familiarize yourself with the unique polarity markings for each capacitor type. Use detailed guides or references when unsure.
3. Incorrect Multimeter Settings
- Issue: Using the wrong mode (capacitance vs. resistance) results in misleading readings.
- Solution: Always ensure the multimeter is set to the correct testing mode before connecting leads. Double‑check the dial before starting.
4. Lead Connection Errors
- Issue: Reversing or misplacing multimeter leads can give false results.
- Solution: Follow proper testing procedures. Connect the red lead to the suspected positive terminal and the black lead to the suspected negative terminal. Refer to the multimeter’s manual if needed.
5. Skipping Datasheets
- Issue: Not consulting datasheets increases the risk of misidentifying polarity.
- Solution: Always verify capacitor markings and test results against the datasheet. Datasheets provide definitive polarity information and specifications.
6. Relying on Generic Knowledge
- Issue: Assuming all capacitors follow the same rules (or relying on memory) can lead to mistakes.
- Solution: Keep datasheets readily available and check each capacitor individually, even if it looks similar to others you’ve used.
7. Using Poor‑Quality Tools
- Issue: Low‑grade or faulty testing equipment can produce inaccurate readings.
- Solution: Invest in reliable test instruments (e.g., JMBom premium used gear). Quality tools ensure consistent and accurate results.
By keeping these troubleshooting tips in mind, you can confidently identify capacitor polarity, avoid common pitfalls, and keep your circuits safe and reliable.
What Happens if Capacitor Polarity Is Reversed?
Connecting a capacitor with the wrong polarity can cause serious problems, affecting both the capacitor itself and the entire circuit. Here’s a summary of the potential consequences:
Damage to the Capacitor
- Dielectric breakdown: Reverse polarity can damage the dielectric material inside polarized capacitors (like electrolytic or tantalum types), leading to failure.
- Electrolyte leakage: Incorrect polarity may cause the capacitor to leak electrolyte, shortening its lifespan and reducing effectiveness.
- Overheating: The capacitor may overheat, which can cause it to swell, rupture, or in extreme cases, explode.
Impact on Circuit Performance
- Malfunction: Reversed polarity disrupts current flow, causing erratic circuit behavior or poor performance.
- Total failure: In severe cases, it can trigger short circuits or open circuits, leading to complete system failure.
Safety Risks
- Explosion hazard: Overheating due to polarity reversal can cause capacitors to explode, sending debris flying and releasing toxic fumes.
- Fire risk: Leakage or overheating might cause short circuits that could ignite nearby materials, creating a fire hazard.
Tips for Ensuring Correct Capacitor Polarity
- Double-check markings: Always confirm polarity symbols on capacitors before installation. Look for ‘+’ and ‘–’ signs, color bands, or differences in lead length.
- Label during projects: Mark capacitors with their polarity while working, especially in complex circuits, to avoid mix-ups later.
- Keep reference guides handy: Maintain a quick‑reference chart or guide for capacitor polarity to help verify markings and prevent errors.
- Use calibrated tools: Make sure your multimeters, oscilloscopes, and other testing gear are properly calibrated and well maintained. Accurate equipment improves the reliability of your polarity checks.
By following these practices, you’ll ensure capacitor polarity is correctly identified—boosting the safety and dependability of your electronic designs.
Boost Your Efficiency with Our Reliable Network Analyzers
Capacitor polarity issues can cause frustrating circuit failures, damage components, and even pose safety risks if overlooked. Common pitfalls include misreading capacitor markings, mixing up capacitor types, and relying on low-quality testing tools.
Our precision network analyzers take the guesswork out of the equation by delivering accurate measurements and clear diagnostics of your capacitor’s properties.
Count on our trusted analyzers to simplify your testing process, safeguard your electronics, and optimize your workflow. Upgrade your testing setup today to prevent polarity errors and ensure your systems run smoothly and safely with our cutting-edge technology.
Subscribe to JMBom Electronics !


