
Arduino Sensors: Types and Uses
Catalog
What Is an Arduino Sensor?Types of Arduino Sensors and How They WorkHow Arduino Sensors WorkApplications of Arduino SensorsCommon Arduino Sensors and Their ApplicationsTouch Screen Sensor ApplicationArduino Sensor Projects and CompatibilityHow Many Sensors Can Be Connected to an Arduino at Once?Related Articles
When electronics enthusiasts begin working on a new project, one of their main concerns is often whether the hardware will be compatible with the available software development environments. Arduino, developed in the early 2000s, was created to solve this challenge.
It was the result of collaboration between a group of Italian graduate students and a professor at the Interaction Design Institute Ivrea. The name "Arduino" comes from Arduin of Ivrea, an Italian king from the 11th century.
One of the key reasons for Arduino's widespread adoption is its open-source nature, which has made it accessible and adaptable. As the platform grew in popularity, a wide range of compatible products—including various Arduino sensors—were developed to expand its capabilities.
What Is an Arduino Sensor?
Thanks to its open-source design, Arduino has grown into a global platform for electronics innovation. Originally created as a prototyping tool, it quickly gained popularity among hobbyists, artists, designers—and especially students who are just starting to explore electronics.
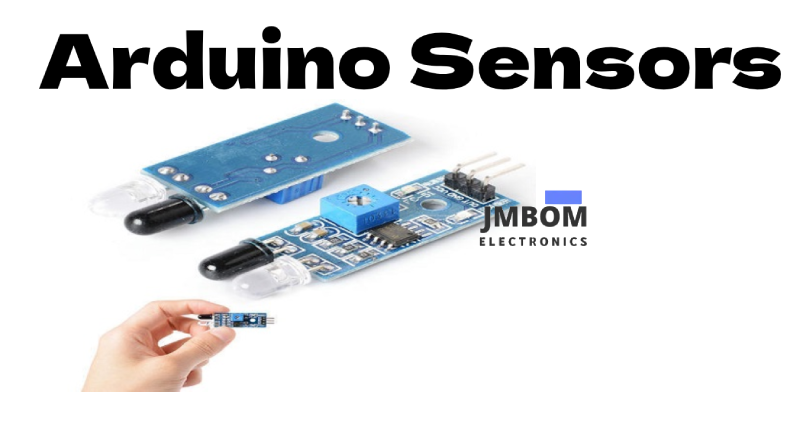
An Arduino board includes a microcontroller and comes with its own software IDE, which lets users write and upload code directly to the hardware. As Arduino became more popular among makers and tinkerers, a wide range of compatible sensors were introduced to extend its functionality and make it even easier to build interactive projects.
Types of Arduino Sensors and How They Work
There are many different types of sensors available for Arduino, each designed to help the board interact with its environment. These sensors are essential for building a wide range of applications, from simple experiments to complex automation projects.
How Arduino Sensors Work
Before Arduino, using microcontrollers was more complicated—there was no built-in software to program the board, and uploading code required separate hardware tools.
Arduino changed that by offering a user-friendly, open-source software IDE that works seamlessly with its hardware. This made it much easier to connect and use sensors.
In most cases, you only need basic components like a breadboard and a few jumper wires to connect a sensor to an Arduino board and start collecting data or controlling devices.
Using Arduino Sensors
Code for Arduino sensors can be written and uploaded through the Arduino IDE. To connect sensors, you'll typically need a power supply, ground connection, a breadboard, and jumper wires.
Applications of Arduino Sensors
Arduino sensors are widely used in a variety of DIY and professional projects, helping turn creative ideas into real-world applications.
For example:
- Ultrasonic sensors are used for non-contact distance measurement. They work by emitting ultrasonic waves and measuring the time it takes for the echo to return—similar to how sonar works.
- IR (Infrared) obstacle avoidance sensors detect objects in front of them and send a digital signal when an obstacle is detected. These are commonly used in robotics for navigation and collision avoidance.
Common Arduino Sensors and Their Applications
- Soil Hygrometer Sensor This soil moisture sensor detects the water content in soil. It outputs a digital signal when the moisture level rises above a set threshold. It’s commonly used in automated self-watering plant systems built with Arduino.
- Microphone Sensor This sensor detects sound levels and generates a signal when the sound intensity exceeds a predefined threshold. It’s useful in sound-activated systems and noise monitoring projects.
- Digital Barometric Pressure Sensor Used to measure atmospheric pressure, this sensor can help calculate the altitude of a robot or a projectile, making it valuable in weather monitoring and altitude tracking applications.
- Photoresistor Sensor (LDR Module) This sensor detects light intensity. It's often used in light-sensitive systems such as night-activated security lights and automatic lighting control.
- Temperature Sensor Measures ambient temperature and is commonly used in weather stations, environmental monitoring, and smart home systems.
- MQ-2 Gas Sensor Designed to detect harmful gases like LPG, i-Butane, Propane, Alcohol, and more. It’s used in safety systems to alert users of gas leaks or the presence of flammable gases.
- Rain Sensor This sensor detects raindrops and is typically used in weather monitoring systems, automatic wipers, and rain-based alerts.
- Flame Sensor Capable of detecting flames and regular light sources. It's used in fire detection systems and flame monitoring devices.
- PIR (Passive Infrared) Sensor Detects motion from humans and animals by sensing infrared radiation. It’s widely used in security systems, motion-activated lights, and pet-monitoring devices.
Touch Screen Sensor Application
A touch screen sensor can be used to create interactive projects like a touch dimmer circuit with Arduino, allowing users to control light intensity with a simple tap.
Examples of Popular Arduino Sensors
A wide range of sensors are available for Arduino, each designed for specific applications. Here are some commonly used types:
- HC-SR04 Ultrasonic Distance Sensor
- IR Infrared Obstacle Avoidance Sensor
- Soil Hygrometer Module / Soil Moisture Sensor
- Microphone Sound Sensor
- Digital Barometric Pressure Sensor
- Photoresistor Sensor (LDR Module)
- Digital Thermal Sensor (Temperature Sensor)
- Rotary Encoder Module
- MQ-2 Gas Sensor (for LPG, Propane, Alcohol detection)
- SW-420 Vibration Sensor Module
- Humidity and Rain Detection Sensor
- Passive Buzzer Module (for audio signals)
- Speed Sensor Module
- IR Infrared Flame Detection Sensor
- 5V 2-Channel Relay Module (for controlling high-voltage devices)
- Breadboard Power Supply Module (3.3V/5V)
- HC-SR501 PIR Motion Sensor (Pyroelectric Infrared)
- Accelerometer Module (for motion and tilt detection)
- DHT11 Temperature and Humidity Sensor
- RF 433MHz Transmitter/Receiver Module (for wireless communication)
Arduino Sensor Projects and Compatibility
Arduino sensors have enabled the creation of countless innovative electronics projects. Some popular examples include:
- Sun Tracker using an LDR (light-dependent resistor) with Arduino
- Rainwater Alarm using a rain sensor
- Gesture-Controlled Robot using an accelerometer and Arduino
- IR Sensor–Based Line Follower Robot
- Motion-Sensing Alarm using an IR sensor
- Ultrasonic Door Alarm
- Distance Measurement System with an ultrasonic sensor
- Smart Blind Stick using multiple sensors
- PIR-Based Home Automation System for controlling appliances
Arduino is often the go-to platform for students and beginners in electronics because of its simplicity and versatility. While these sensors are designed to be Arduino-friendly, many can also be used with other microcontrollers. The Arduino IDE provides a wide range of libraries to make interfacing with different sensors easy and efficient.
However, some advanced sensors that require high-speed data processing may exceed the capabilities of basic Arduino boards like the Uno.
How Many Sensors Can Be Connected to an Arduino at Once?
The number of sensors you can interface with a single Arduino board depends on several factors, including:
- The number of available input/output (I/O) pins
- Whether the sensors use digital, analog, I2C, or SPI communication
- Power requirements of the sensors
- Processing power and memory limits of the board
With the right combination of sensors and communication protocols (like I2C, which allows multiple devices on the same bus), you can connect dozens of sensors to a single Arduino—especially with the help of I/O expanders or multiplexers.
Related Articles
Throttle Position Sensors: How They Work and Where They're Used
How Inductive Sensors Work and Where They're Used
How a Flame Sensor Works and Where It's Used
How a Flex Sensor Works and Where It's Used
How Touch Sensors Work and Where They're Used
Soil Moisture Sensors: How They Work and Where They're Used
2SA1015 Transistor: Pinout, Features, and Common Uses
Popular 555 Timer Circuit Ideas for Engineering Projects
2SC5200 Transistor: Overview, Pinout, and Common Uses
Subscribe to JMBom Electronics !


