
How to Check Resistance Using a Digital Multimeter
Catalog
Step-by-Step Guide to Measuring Electrical ResistanceUsing Advanced Features on Digital MultimetersHow to Measure Resistance with a Digital MultimeterHow to Interpret Electrical Resistance Measurement ResultsDigital Multimeter Resistance DisplayFrequently Ask QuestionsRelated ArticlesResistance can be checked with either analog or digital multimeters. These devices also measure voltage, current, and other electrical properties for a wide range of uses. But why test resistance? It helps you assess the health of a circuit or component. Generally, higher resistance means less current flows, while lower resistance allows more current to pass through.
Typically, components that control circuits—like switches and relay contacts—start with very low resistance, but it tends to increase over time due to wear and dirt buildup. On the other hand, parts like motors and solenoids often experience a drop in resistance over time because of insulation damage and moisture exposure.
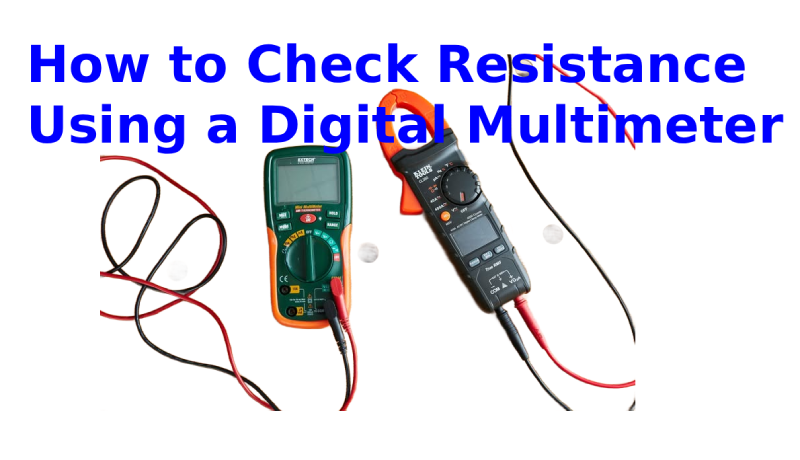
Step-by-Step Guide to Measuring Electrical Resistance
Step 1. Power Off the Circuit
Before measuring resistance, make sure the circuit power is off. If the circuit has a capacitor, discharge it fully to avoid inaccurate readings or damage.
Step 2. Set the Digital Multimeter to Resistance (Ohms)
Turn the dial on your digital multimeter to the resistance or ohms (Ω) setting. This mode may share the dial with other tests like continuity, capacitance, or diode checks (see the diagram below).
You’ll usually see "OLΩ" on the screen, which means the meter is ready to measure resistance. This happens even before you connect the test leads, since the multimeter constantly checks resistance in this mode.
You might also see "MΩ," showing the very high resistance of open (disconnected) test leads.
When you connect the leads to a component, the multimeter will automatically adjust its measurement range (Autorange). You can also manually change the range by pressing the Range button if needed.
For the most accurate results, it’s best to remove the component from the circuit before testing. If left connected, other parts in parallel may affect the reading.
Step 3. Insert the Test Leads
Plug the black lead into the COM (common) jack, and the red lead into the VΩ jack. When done testing, remove the leads in reverse order—red first, then black.
Step 4. Attach Leads to the Component
Connect the test leads across the component you want to measure. Make sure you have a solid contact for accurate readings.
Tip: For measuring very low resistance, use the relative mode (REL), sometimes called zero or Delta (Δ) mode. This mode automatically subtracts the resistance of the test leads (usually 0.2 to 0.5 Ω). Ideally, if you touch the test leads together, the display should read close to 0 Ω.
Keep in mind factors that can affect your resistance reading: dirt, solder residue, oil on contacts, touching the metal parts of the leads with your hands, or having parallel circuit paths. Your body can act as a parallel resistance path, lowering the overall resistance, so avoid touching the metal ends during testing.
Step 5. Read the Resistance on the Display
Check the value shown on the multimeter screen to know the resistance.
Step 6. Turn Off the Multimeter
Switch off your multimeter when finished to save battery life.
Using Advanced Features on Digital Multimeters
Step 7. Choose a Fixed Measurement Range
Press the RANGE button to pick a specific range instead of Autorange. Watch for indicators like K (kilo-ohms) or M (mega-ohms) on the screen.
Step 8. Hold a Stable Reading
Use the HOLD button to freeze the current measurement so you can view it later without keeping the leads connected.
Step 9. Record Minimum and Maximum Values
Press the MIN/MAX button to capture the lowest and highest readings during a test. The meter will beep each time a new extreme value is recorded.
Step 10. Set a Reference Point
Press the REL (relative) button to set a baseline reference. The meter will then display measurements relative to this reference, showing how much values go above or below it.
How to Measure Resistance with a Digital Multimeter
Multimeter Basics
Resistance can be measured with either analog or digital multimeters. These versatile tools also measure voltage, current, and other electrical parameters across many applications. So why measure resistance? It helps you check the condition of a circuit or component. Higher resistance means less current flows, while lower resistance allows more current through.
Generally, components that control circuits—like switches and relay contacts—start with very low resistance but tend to increase it over time due to wear and dirt buildup. On the other hand, loads such as motors and solenoids often show decreasing resistance over time because of insulation damage and moisture intrusion.
How to Interpret Electrical Resistance Measurement Results
The meaning of a resistance reading depends on the specific component you’re testing. Resistance can vary over time and from one component to another. Small changes in resistance are often not critical but can reveal trends worth monitoring. For example, when the resistance of a heating element increases, the current flowing through it decreases—and the opposite is true when resistance drops. (See diagram below.)
Digital Multimeter Resistance Display
When testing components on a circuit board, it’s sometimes necessary to lift one lead of a resistor off the board to get an accurate resistance reading. This is because a digital multimeter measures the total resistance along all paths between the test probes.
Be careful when measuring resistance on components still connected in a circuit. The resistance of other components connected in parallel with the one you’re testing will affect the reading, usually causing it to be lower than the component’s actual resistance. Always consult the circuit schematic to identify any parallel paths that might influence your measurement.
Frequently Ask Questions
What Is the Resistance Mode on a Multimeter?
In resistance mode, the multimeter applies a small, fixed voltage to the resistor and measures the resulting current. Using Ohm’s Law, it then calculates the resistance value. If the circuit is powered, the current flow will be affected, which can lead to inaccurate readings. Even when unpowered, the reading may vary if other connected components draw some of the meter’s test current.
What Should You Do Before Measuring Resistance?
- Prepare Your Workspace – Ensure your work area is safe, clean, and free from hazards.
- Set Up the Multimeter – Select the resistance (ohms) setting on the dial.
- Connect the Probes – Plug the black lead into the COM jack and the red lead into the VΩ jack.
- Test the Resistor – Place the probes across the resistor’s terminals to measure resistance.
- Switch Off and Disconnect – Turn off the meter and remove the probes when finished.
- Review Your Measurements – Note the readings and compare them to expected values.
What Is the Most Accurate Way to Measure Resistance?
For very low resistance values, a four-terminal (Kelvin) resistance meter is the most accurate option. Standard analog and digital multimeters calculate resistance using Ohm’s Law, based on the measured voltage and current. While both types are used in a similar way, a four-terminal setup minimizes lead resistance errors for precision measurements.
When to Use Ohms vs. Continuity Mode
An ohmmeter measures the resistance between two points, showing the exact value in ohms. It’s often used to check continuity, but continuity testing itself is not a precise measurement—it’s simply a yes/no check to confirm there is an electrical path between two points. If continuity exists, it means electricity can flow; if not, the path is open.
Related Articles
How to Measure RF Power Using a Spectrum Analyzer
How to Charge Lithium Battery:Steps
What is a Complementary Metal Oxide Semiconductor (CMOS)?
Parallel Resistor Calculator & A Practical Guide for Electrical Engineers
Network Analyzer vs. Spectrum Analyzer:Use & Specifications
How to Determine Capacitor Polarity
How to Test a Fuse Using a Multimeter
How to Check Current With a Multimeter
How to Operate a Voltage Tester
Electrical Measurements: Common Types, Tools, and Calculations
Subscribe to JMBom Electronics !


